How to Edit Real-Life Real Estate Photos That Get More Bookings
Knowing how to edit your own real estate photos is less about technical wizardry and more about making a space feel bright, clean, and inviting. My goal, and yours, isn’t to mislead anyone, but to present the property at its absolute best. We’re just talking about adjusting light and color, straightening out those walls that look like they’re leaning after a long night, and cleaning up minor blemishes. Once you get the hang of a few core techniques, you can turn flat, uninspired snapshots into listing photos that genuinely capture attention and drive bookings.
Why Great Photos Are Your Most Powerful Booking Tool
Let's be real: when someone is scrolling through rental listings, it’s a visual knockout round. I've seen it a thousand times. Long before they read your charming property description or scan your glowing reviews, they’ve already made a snap judgment based entirely on your photos. That first glance is everything—it’s the moment a potential guest decides whether to click for more or just keep on scrolling.
This isn't just a hunch; it’s baked into how we all shop online. Professional-looking photos do more than just display your space; they instantly build trust. They send a powerful, unspoken message that you’re a host who pays attention to detail, cares about the guest experience, and offers a quality stay.
Just think about your own browsing habits. Would you book a room that has dark, blurry, or crooked pictures? Probably not. Bad photos plant seeds of doubt and whisper, "if they can't be bothered with photos, what else are they neglecting?" On the flip side, a gallery of bright, sharp, and well-composed images makes a property feel safe, clean, and worth every penny.
The Psychology Behind a Great Listing Photo
So, what’s the secret sauce that makes a photo feel clickable and trustworthy? It boils down to a few key elements that work together to give potential guests confidence from the second they see your listing.
- Brightness and Clarity: A well-lit photo just feels clean and open. It tells people you have nothing to hide in shadowy corners.
- True-to-Life Colors: Getting the colors right—from the wall paint to the throw pillows—sets accurate expectations. This simple step helps avoid that dreaded feeling of disappointment when a guest walks in the door.
- Straight Lines: Photos with straight vertical and horizontal lines look polished and professional. It's a subtle cue that makes a space feel solid and well-built, not warped or unsettling.
These aren't just artistic choices; they are direct signals of value and professionalism. I’ve personally watched hosts double their inquiries almost overnight just by swapping out their old phone pics for properly edited images. The effect is immediate because you're directly influencing a guest's perception of quality.
A great photo doesn't just show a room; it sells an experience. It lets people imagine themselves kicking back on that couch or sipping coffee on that balcony. It turns a simple listing into a destination.
From Clicks to Bookings: The Data-Backed Impact
The link between photo quality and booking success isn’t just anecdotal—it’s supported by some pretty solid numbers. Research consistently shows that listings with high-quality, professionally edited images get a whopping 118% more online views than those with amateurish photos.
But it’s not just about getting more eyes on your property. The impact on conversions is just as powerful. Properties with professional photos can sell up to 50% faster. While that stat is from the sales market, the principle for rentals is exactly the same: better photos mean faster bookings and fewer vacant nights.
Learning how to edit real estate photos is one of the highest-return skills you can develop as a host. It elevates your listing in a crowded market and has a direct, positive impact on your bottom line. Even simple lighting adjustments can be a game-changer. For a deeper dive, you might want to check out our guide on mastering lighting for photography to help you get better shots from the start.
Setting the Stage for a Flawless Edit
I learned this lesson the hard way, spending countless hours trying to rescue dark, blurry photos early in my career. Here’s the unvarnished truth: you can't edit what isn't there. Software can certainly enhance a good photo, but it can’t work miracles on a bad one.
Think of it like cooking. Even the world's best chef can't make a masterpiece from spoiled ingredients. Getting the fundamentals right during the actual photoshoot is the real secret to a fast, easy, and professional-looking edit. This all comes down to three things before you even press the shutter button: stability, light, and staging.
Nail the Basics of Capture
The number one enemy of a great real estate photo is blur. Even the tiniest shake can render an image completely unusable, and no "sharpen" tool in your software can truly fix it. The solution is simple: get a tripod. It eliminates camera shake and ensures every last detail is crisp.
Next up is perspective. Shooting from chest height often makes a room look like it's tilting away from you. Instead, try setting your tripod to about waist level—somewhere around 4 feet is a good starting point. This perspective feels much more natural, almost like you're walking into the room, and it keeps all the vertical lines straight and true. That’s a key trick for making a space feel grounded and spacious.
Finally, let's talk about composition. One of the easiest guidelines to follow is the Rule of Thirds. Just imagine a tic-tac-toe grid over your viewfinder. By placing key features, like a cozy fireplace or a statement window, where those lines intersect, you create a far more balanced and visually engaging photograph.
Harness the Power of Light and Staging
Lighting is the soul of a photograph. Bad lighting can make a stunning room feel cramped and gloomy, while great lighting makes it feel airy, bright, and welcoming.
Whenever you possibly can, use natural light. Throw open all the blinds and curtains. Try to schedule your shoot for a time when the sun isn't blasting directly into the windows, as that creates harsh, unflattering shadows.
If you're stuck with a dark day or a room with few windows, don't be afraid to add some artificial light. While professional gear is a huge help, you can get by with just turning on all the interior lamps. Just make sure the bulbs are all the same color temperature to avoid that messy mix of yellow and blue light. For those ready to level up, our guide on the best lighting equipment for photography is a great place to start.
Staging isn't about redecorating; it's about decluttering. The goal is to create a clean, neutral canvas that allows potential guests to envision themselves in the space.
Staging is all about prepping the room for its close-up. Think of it less like interior design and more like a thorough decluttering to remove personal items and distractions. A clean space always looks bigger and more inviting.
To help you get started, here's a quick checklist I run through before every shoot. It ensures the space is ready and saves me a ton of headache in post-production.
Pre-Shoot Staging Checklist
| Area | Action Item | Why It Matters |
|---|---|---|
| Living Room | Remove personal photos, magazines, and remote controls. | Creates a neutral, hotel-like feel that appeals to a broader audience. |
| Kitchen | Clear countertops completely, except for one or two decorative items. | Showcases the available counter space, which is a key selling point. |
| Bedrooms | Make beds perfectly and clear nightstands. | A tidy bed makes the room look clean and relaxing. |
| Bathrooms | Hide all toiletries, close the toilet lid, and hang fresh towels. | Emphasizes cleanliness, a non-negotiable for most guests. |
| General | Add a simple plant or a bowl of fruit for a pop of color. | A small touch of life can make a space feel more vibrant and homey. |
Nailing these pre-shoot fundamentals—stabilizing your camera, optimizing the light, and thoughtfully staging each room—is what sets you up for success. You'll find yourself spending far less time wrestling with editing software and more time creating that polished, professional look that gets you more bookings.
Your Hands-On Photo Editing Workflow
This is where the magic really happens—turning good photos into fantastic ones. After editing thousands of property images, I’ve landed on a simple, repeatable process that just works. It’s a system I’ve refined over the years, designed to tackle the big-ticket items first so that every other adjustment down the line is easier and more effective.
We're not just going to push sliders around and hope for the best. There’s a logic to it. We’ll start by fixing the foundation: light and color. From there, we’ll straighten out the structure by correcting perspective. Only then do we add the finishing touches with color enhancement and cleanup. This step-by-step approach is your ticket to a consistently professional look without getting bogged down for hours on a single image.
But before we even open up our editing software, remember that a great edit starts with a great photo. The prep work you do on-site makes everything that follows a whole lot smoother.
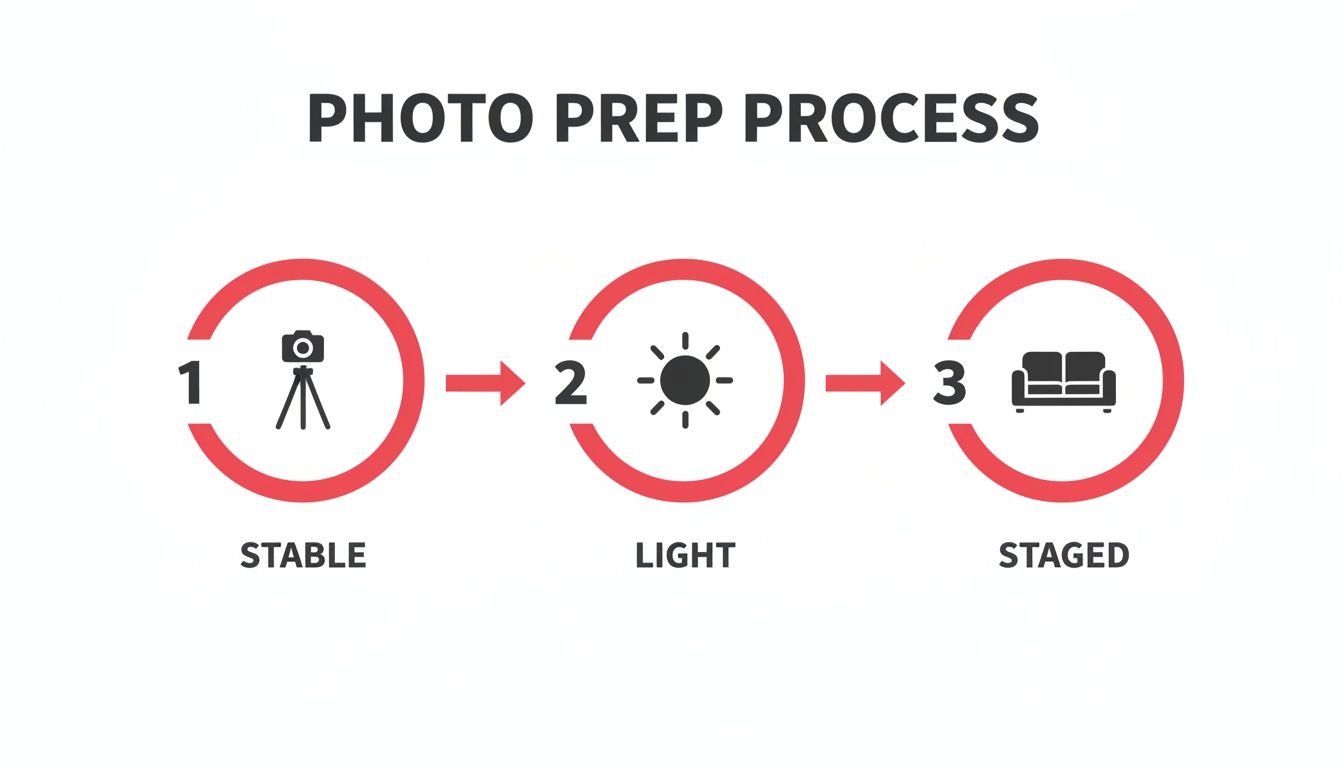
This little guide is a great reminder that getting the camera stable, the lighting right, and the room staged properly will save you a ton of time at the computer.
First Things First: Correcting Exposure and White Balance
The very first thing I look at is the light and color. If these are off, nothing else you do will matter. A room that looks dark and yellow in a photo feels dingy and uninviting to a potential guest, even if it's gorgeous in person. Our first job is to make the image feel bright, clean, and true to life.
I always start with exposure, which is just the overall brightness of the shot. The aim is to make the room look like it’s filled with beautiful, natural light. Gently bump up the exposure until you can see details in the darker corners, but be careful not to "blow out" the highlights. That’s what happens when bright areas, like windows, lose all their detail and just turn into white blobs.
Next up is white balance, which sets the color temperature. Ever taken a photo indoors and had it come out looking weirdly yellow or orange? That's a white balance problem. In your editing software, look for a "temperature" slider. If the image is too warm (yellow), slide it a bit toward blue. If it’s too cool (blue), slide it toward yellow.
A neutral white balance is your goal. White walls should look white, not cream or baby blue. This one adjustment instantly makes a space feel cleaner and more modern.
Getting this right is all about accurate representation. If you're having trouble judging it by eye, most programs have an eyedropper tool. Just click it on something that should be neutral gray or white in the photo, and it'll do the work for you. For a deeper dive, our guide explains what white balance is in photography and why it’s so critical.
Next, Fix the Perspective and Straighten Lines
Once the light and color feel right, my eyes immediately jump to the lines in the photo. Crooked images are one of the most common and jarring mistakes I see in property listings. When walls, doorways, and windows look like they’re leaning, it throws off the whole vibe and makes the space feel unstable.
This is where perspective correction tools save the day. Every decent editing app has them, from Adobe Lightroom to free mobile options. Look for a panel labeled "Transform," "Geometry," or "Perspective." Inside, you’ll usually find sliders for vertical and horizontal tweaks.
- Vertical Correction: This is your MVP. Use it to make sure the vertical lines in the photo—like the corners of a room or the edges of a doorframe—are perfectly straight.
- Horizontal Correction: This one ensures horizontal lines, like countertops or the bottom of a window, are perfectly level.
- Rotate/Straighten Tool: For a simple tilt, this tool is perfect for leveling the entire image.
You don't need much. Even small adjustments make a room feel more solid, spacious, and professionally shot. I can’t stress this enough: straight lines signal quality and care to potential guests. It's a subtle detail, but it has a massive psychological impact.
Now, Enhance Colors and Add Some Pop
With the fundamentals locked in, it's time to have a little fun. This is where we make the colors feel vibrant and appealing, but—and this is a big but—without making them look fake. We’re aiming to enhance reality, not create a cartoon.
I mainly rely on two key sliders for this:
- Vibrance: This is my go-to. It’s a smart tool that boosts the more muted colors in your image without oversaturating the colors that are already strong. It’s perfect for making the blue of a swimming pool or the green of a garden look richer without making a person’s skin tone look weird.
- Saturation: This one increases the intensity of every color equally. Use it with caution! A tiny nudge can add life to a photo, but pushing it too far is the fastest way to make it look cheap. I almost never push saturation beyond +5 or +10.
Think of a living room with a colorful painting on the wall. Upping the vibrance will make that art pop without turning the neutral-colored sofa an odd shade of beige. It’s all about guiding the viewer’s eye to the best features of the room.
Finally, Do Some Basic Retouching and Cleanup
My final pass is always a detailed cleanup. This is where we hunt down and remove the small, distracting elements that can chip away at an otherwise polished photo. We’re talking about tiny imperfections that you might not notice at first but that can subconsciously make an image feel less professional.
Look for a "Spot Removal," "Healing Brush," or "Clone Stamp" tool. These let you "paint" over an imperfection, and the software intelligently replaces it with a clean texture sampled from a nearby area.
Here’s a quick checklist of things I always look for:
- Scuff marks on the walls or baseboards
- Dust bunnies hiding in a corner
- A stray phone charger cord you forgot to hide
- Small dead patches on the lawn or patio
This isn't about being deceptive. You’re not removing a giant crack in the wall. You’re just digitally tidying up, the same way you’d fluff the pillows before a guest arrives. This last step is what separates a good photo from a great one, ensuring nothing distracts from your property’s best features.
Common Editing Mistakes That Hurt Your Listing
It's so easy to get carried away with photo editing. With just a few slider adjustments, you can turn a beautiful room into a radioactive-looking fantasy land. And trust me, nothing screams "amateur" or erodes guest trust faster than an obviously over-processed photo.
Think of this section as your safety net. We're going to walk through the most common pitfalls I see hosts fall into and talk about how to find that perfect "sweet spot." Remember, our whole goal here is to enhance reality, not create a completely different one.
The Over-Saturation Trap
This is, without a doubt, the number one mistake I see. You want your colors to pop, so you grab that saturation slider and crank it all the way up. Suddenly, the grass is an electric green, the wood floors are a fiery orange, and the blue sky looks like it belongs on another planet.
This doesn't make your property look more appealing; it just makes it look fake. Potential guests are savvy, and they can spot an oversaturated photo from a mile away. It immediately makes them wonder what else you might be exaggerating in your listing.
Instead of hammering the saturation, try making a small adjustment to the vibrance slider first. Vibrance is a bit smarter—it boosts the more muted colors without making the already-strong ones look garish. A gentle touch is all you need.
The HDR Overdrive Effect
High Dynamic Range (HDR) is a technique that blends multiple exposures to capture details in both the brightest and darkest parts of a photo. When done well, it’s magic. When done poorly, it creates a flat, grungy, and surreal image with weird halos around objects.
You’ll recognize this mistake by its "crunchy" look. The textures are exaggerated, all the natural shadows disappear, and the whole image feels unnatural. It strips the photo of its depth and warmth, making your cozy rental feel more like a scene from a video game.
My rule of thumb is this: if you can tell a photo is HDR, it's been overdone. The best HDR edits are so subtle that the viewer just thinks it's a perfectly lit photograph.
Ignoring Distorted Perspectives
We touched on straightening vertical lines earlier, but it’s so important it’s worth repeating here as a common mistake. When you use a wide-angle lens to make a room look bigger, it can sometimes warp the objects near the edges of the frame.
A chair might look stretched out, or a lamp might appear to be leaning at a bizarre angle. Even if the walls are perfectly straight, these funhouse-mirror distortions can make the space feel unsettling and unprofessional.
Take an extra minute to check for these issues. Most modern editing software has tools to correct lens distortion automatically. Applying this correction can instantly make your photos look more polished and true to life.
Excessive Sharpening
A sharp, crisp photo is the goal, but there’s a fine line between sharp and "crunchy." Pushing the sharpening tool too far introduces digital noise and creates harsh, pixelated edges around your furniture and fixtures.
Instead of making the image clearer, it just makes it look cheap and low-quality. A great way to check your work is to zoom in to 100%. If you see jagged lines or a grainy texture that wasn't there before, you’ve gone too far. Dial it back until the details are defined but still look natural.
Here’s a quick cheat sheet for avoiding these common traps:
| The Mistake | The Better Approach |
|---|---|
| Pushing saturation to +50 | Increase vibrance by +10 and maybe saturation by +5. |
| Maxing out HDR effects | Use HDR subtly to balance light, not eliminate shadows. |
| Leaving warped furniture | Apply lens correction profiles to fix wide-angle distortion. |
| Over-sharpening the whole image | Apply a moderate amount of sharpening and check it at 100% zoom. |
Learning how to edit your own photos is a journey of subtlety. By avoiding these all-too-common mistakes, you’ll produce images that are not only beautiful but also authentic—building the trust you need to turn scrollers into bookers.
When to Outsource Your Photo Editing
Learning to edit your own real estate photos is a fantastic skill to have in your toolkit. But we need to have a frank conversation about your most precious resource as a rental host: your time. Is spending hours hunched over a keyboard, tweaking sliders in editing software, really the best use of it?
Sometimes, the smartest move you can make in your business is to hand off certain tasks to a specialist. Photo editing is a perfect example, where a small investment can pay you back tenfold in saved time and, more importantly, increased bookings.
Time: The Biggest Bottleneck
Think back to the last time you shot a property. Editing a gallery of just 15-20 images can easily swallow an entire afternoon. You're carefully adjusting exposure, fixing weird color casts, straightening lines, and spotting blemishes on every single photo.
That's time you're not spending on guest communication, coordinating with your cleaning crew, or brainstorming the next upgrade for your property. For most hosts I know, the clock is the enemy. If you’re juggling multiple properties or a full-time job, those editing hours pile up fast. Outsourcing isn’t quitting; it’s strategically buying back your time to focus on the things only you can do.
The Struggle for Consistency
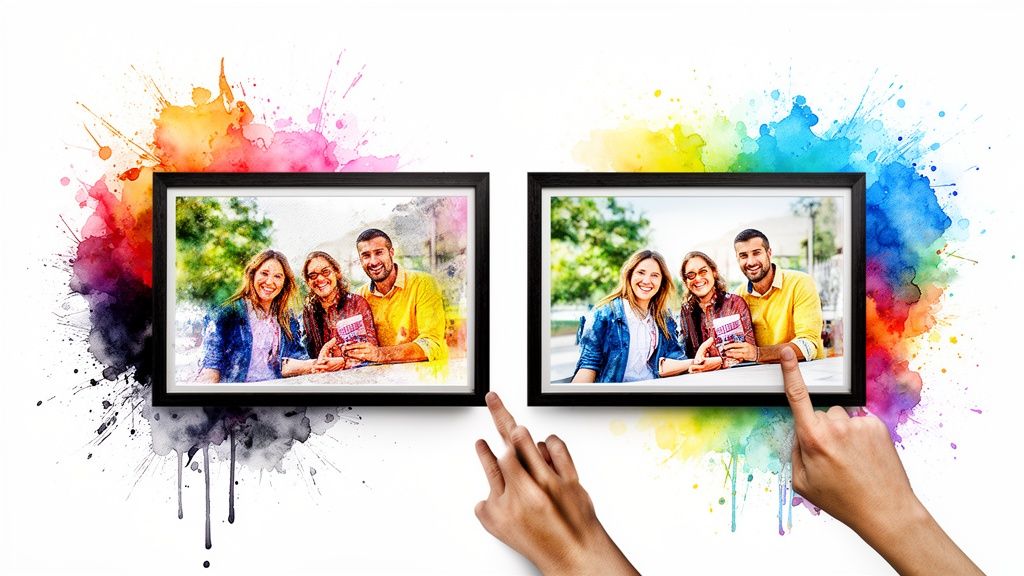
Getting a consistent, professional look across all your photos is harder than it seems. It's one of the biggest challenges of DIY editing. One photo might come out a little warmer, the next a touch brighter, and suddenly your whole gallery feels disconnected and a bit amateurish.
This is where professional editing services really shine. They ensure every image in the set has the same color balance, brightness, and overall vibe. This kind of consistency is crucial for building a brand that feels polished and trustworthy, signaling to potential guests that you’re a host who sweats the small stuff.
Handing off your editing isn't just about saving time—it's about upgrading your final product. You get consistently beautiful, magazine-quality photos that make your property shine, every single time.
Meeting Modern Expectations
The real estate world moves fast, and that has changed expectations for how quickly photos get turned around. The industry standard has accelerated, with many real estate agents now expecting edited photos back the very next day, or even the same day. AI-powered editing tools have become essential for hitting these deadlines without compromising quality, automating complex jobs like HDR blending and window masking that used to take hours. You can discover insights on modern real estate editing to see how the landscape is changing.
When a Service Like rental.photos Makes Sense
This is exactly where a dedicated service like rental.photos can be a total game-changer for a busy host. Instead of wrestling with software, you just upload your raw photos and get professionally polished images back, often in less than 24 hours.
So, when should you pull the trigger and outsource? It probably makes sense if you're in one of these boats:
- You're swamped. Your to-do list is a mile long, and editing photos keeps slipping to the bottom.
- You're not thrilled with your results. You've given it a shot, but your edits don't quite have that "wow" factor you see in top-performing listings.
- You crave a polished look. You want every single photo to look like it belongs in the same high-end gallery.
- You see the bigger picture. You understand that a small upfront cost for pro editing can directly lead to more eyes on your listing and more heads in beds.
At the end of the day, outsourcing is a small investment that frees you up to be a better host and run a more profitable business.
Your Photo Editing Questions Answered
After countless conversations with rental hosts just like you, I've noticed the same handful of questions pop up again and again. It's totally normal to feel a bit stuck when you're starting out with photo editing. Let's clear up some of the most common hurdles so you can edit with confidence.
Think of this section as our personal chat, where I share the straightforward advice I wish I had when I first started. There are no silly questions here—just practical answers to help you create better listing photos.
What Is the Best Editing Software for a Beginner?
This is easily the most common question I get, and my answer is always the same: start simple. For most beginners, I highly recommend Adobe Lightroom. Its interface is built around intuitive sliders for things like exposure, contrast, and color, which makes learning the fundamentals a breeze—especially on the mobile app.
Don't underestimate the incredibly powerful editors built right into modern smartphones, either! They're often more than capable of handling the basic adjustments you'll need. If you're looking for a free yet robust desktop option, GIMP is a solid choice, but be prepared for a steeper learning curve.
The key isn't the specific tool you use, but your understanding of the core principles. Focus on fixing brightness, correcting color, and straightening lines. Once you master those basics, you can create amazing results with almost any software.
How Do I Make My Photos Bright Without Looking Fake?
Ah, the classic challenge! Nailing that bright, airy look without veering into "blindingly artificial" territory is a delicate dance. The secret lies in a balanced approach, not just cranking up one slider and calling it a day.
First, gently increase the 'Exposure' until the image feels well-lit. Stop right before you start to lose the details in the brightest areas, like the view through a window. This is the crucial first step.
Next, you'll want to balance the light within the image itself. Here’s the magic combo:
- Slightly decrease the 'Highlights' slider. This brings back detail and texture in those bright spots you were worried about.
- Gently lift the 'Shadows' slider. This reveals the details that were hiding in the darker corners of the room.
This combination brightens the entire image evenly without "blowing out" the highlights, which is what creates that fake, flat look. The final touch is to double-check your 'White Balance' to ensure the colors are neutral and clean. This method enhances the natural light that’s already there instead of trying to fake it.
Is Hiring an Editing Service Worth It If I Can Do It Myself?
That's a fantastic question, and the honest answer really comes down to one thing: what is your time worth? While you can absolutely learn how to edit your own photos, the process is time-consuming. Professionally editing a full set of 20-30 images can easily take up several hours of your day.
An editing service delivers two things that are incredibly hard to achieve on your own: professional quality and rock-solid consistency, delivered fast. They handle the complex tasks like perfect color correction across an entire gallery and advanced retouching that might be beyond a beginner's skill set. For reference, the national average for a standard photoshoot is around $230, but that's for the photographer's time on site. Editing is a whole separate beast.
Think of outsourcing your editing as a strategic investment in your business. For a small fee, you reclaim valuable hours you can spend on guest communication or marketing, and you get a superior final product that can directly lead to more bookings. It’s not about whether you can do it, but whether you should.
If you decide that your time is better spent focusing on your guests, rental.photos is here to help. We take the tedious work of photo editing off your plate so you can get back to what you do best. Just upload your images, and our team of human-reviewed AI and professional editors will deliver stunning, booking-ready photos in under 24 hours. Elevate your listing and save your time by visiting us at https://rental.photos.
Ready to have professional photos?
Our team transforms your existing rental photos into stunning, high-converting images that bring you more bookings. No photoshoot required. 100% refund guaranteed.
Improve My Photos →