Lighting for Photography: My Secret to Capturing Irresistible Rental Photos
Your photos are the very first thing a potential guest sees, and great lighting is what makes them stop scrolling. This isn't just about making your space look bright; it's about creating a feeling. You want to instantly communicate that your property is clean, safe, and welcoming. Good lighting builds that crucial first impression of trust and can be the single thing that turns a casual browser into a confirmed booking.
Why Lighting Is Your Secret Booking Weapon
Let’s be real: your listing photos are your digital handshake. Before a guest reads a single word of your carefully crafted description or skims your five-star reviews, they've already made a snap judgment based entirely on your images. This is where the power of lighting truly shines.
I learned this lesson the hard way. For months, my own rental property got steady but pretty unremarkable interest. The photos were… fine. I took them on a decent smartphone and made sure to show all the rooms, but they just lacked a certain spark. Out of frustration, I decided to reshoot everything, but this time I focused only on one thing: light.
Instead of just snapping pictures whenever I had a spare moment, I waited for that soft, golden afternoon light to pour into the living room. For the bedrooms, I turned on every cozy lamp to create a warm, inviting glow before I even touched the camera.
The result was immediate and undeniable. Within a week of uploading the new, better-lit photos, my inquiry rate more than doubled. The only thing I changed was the lighting.
From Scroller to Booker
Great lighting does more than just make a room look bright; it tells a story. It silently communicates quality and attention to detail. Just think about the feeling you get from a photo of a sun-drenched kitchen versus a dimly lit, shadowy bedroom. One feels cheerful and clean, while the other feels… well, a bit uncertain.
This emotional connection is where the magic happens. A well-lit photo can:
- Build Instant Trust: Bright, clear images suggest you have nothing to hide. They feel transparent and clean, which makes guests feel more secure.
- Highlight Key Features: Proper lighting naturally draws the eye to your best amenities, whether it's a sparkling new appliance, a cozy reading nook, or a beautiful piece of art.
- Justify a Higher Rate: Professional-looking photos create a perception of higher value, which can help you command a better price without pushback.
And this isn't just my experience. The broader trend in photography shows a massive investment in quality lighting. In fact, the market for professional lighting for photography equipment is growing rapidly. More importantly for hosts, studies have shown that balanced lighting can increase click-throughs by a whopping 40% in real estate listings. This data proves how effectively great lighting can turn scrollers into bookers. Learn more about the photography lighting market and its growth.
You don't need a Hollywood budget to get incredible results. By understanding how to shape and capture light, you can create a visual narrative that compels visitors to click that 'Book Now' button with confidence.
Ultimately, mastering lighting for photography is about making a powerful first impression that lasts. When you're ready to take your photos to the next level, a professional touch can make all the difference. You can see how professional photo enhancement can transform your listing at rental.photos.
Working With Natural Light: Your Best Free Tool
Forget about spending a fortune on fancy lighting gear. Seriously. The most powerful, beautiful, and effective light source you have is already streaming through your windows, and it's completely free. Getting those bright, inviting photos that stop scrollers in their tracks is all about learning to work with the sun, not against it.
One of the first things I do when prepping a property for photos is a "light scout." I'll walk through the entire space at different times of the day—morning, noon, and late afternoon—and take quick notes on my phone. Where does the soft morning light fall? Which room gets that magical golden glow before sunset? This simple habit is an absolute game-changer.
Finding Your Property's Sweet Spot
Think of your windows as giant, natural softboxes. Your job is to understand the kind of light they're putting out. When the sun shines directly into a room, it creates what's called direct light. This is your enemy. It causes harsh, dark shadows and super-bright "hot spots" that get completely blown out in a photo, making everything look amateurish.
What you're looking for is indirect light. This is the beautiful, soft light that fills a room when the sun is on the other side of the house. It wraps around furniture gently, minimizes those distracting shadows, and creates the bright, airy, and welcoming vibe that gets guests to click "Book Now."
Great photos build trust, and trust leads directly to bookings. It's a simple, powerful formula.
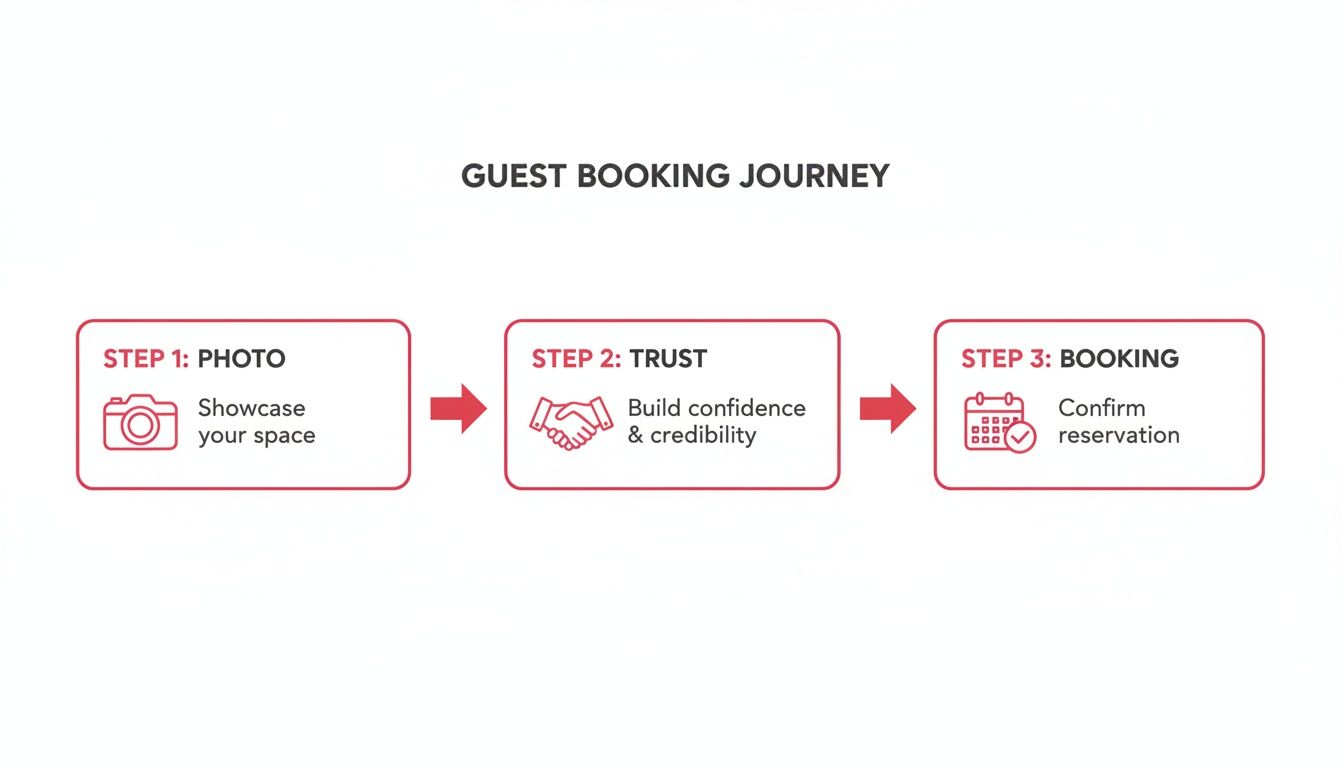
This visual shows just how critical that first impression is. Your photos are the first step in earning a guest's confidence.
A Few Tricks to Shape the Sunlight
Once you've figured out the best times for each room, you can start playing with that light. You don't need a professional's toolkit; a few simple items can make a huge difference. These are my go-to techniques on almost every shoot.
- Soften with Sheers: If your windows have sheer white curtains, use them! They act as a perfect natural diffuser, turning harsh sunlight into a soft, even glow that fills the room beautifully.
- Watch Your Angles: A rookie mistake is shooting into a bright window. This turns your interior into a dark silhouette and blows out the window into a block of white. Instead, stand with your back near the window or off to the side, letting that light spill into the room and illuminate your shot.
- Bounce It Around: Got a dark corner opposite a window? Grab a cheap white foam board from a craft store. By holding it just out of the camera's view, you can bounce light from the window back into the shadows, brightening them up instantly.
Remember, the goal isn't to kill every shadow—shadows create depth and make a space feel real. You just want to soften them so they add to the photo instead of distracting from it.
The Best Times to Shoot (And Why It Matters)
Timing is everything. A north-facing living room might have nice, consistent light all day, making it an easy win. But that east-facing bedroom? It's going to be absolutely gorgeous in the soft morning light but might look harsh and shadowy by the afternoon.
And that west-facing patio? That's your golden hour money shot. Capturing it just before sunset will drench it in warm, dreamy light that screams "vacation." Learning your property's rhythm is the key.
Here’s a quick reference I use to plan my photo shoots.
Natural Lighting Cheat Sheet for Different Times of Day
| Time of Day | Type of Light | Best For | Pro Tip |
|---|---|---|---|
| Early Morning | Soft, Cool, Diffused | East-facing rooms, kitchens, and bedrooms for that fresh, "wake-up" vibe. | Get your shots in before the sun climbs too high and creates harsh, distracting shadows. |
| Midday | Bright, Overhead, Harsh | Usually the worst time for interiors. Great for outdoor amenities like pools or decks where you want that bright, sunny look. | If you must shoot inside, use sheer curtains or blinds to diffuse the intense light. |
| Late Afternoon | Warm, Directional, Soft | West-facing rooms, living areas, and outdoor patios. This is the famous "golden hour." | The long, soft shadows at this time can add incredible depth and texture to your photos. |
By planning your shoot around the sun's schedule, you’ll capture photos that feel authentic, bright, and unbelievably inviting—all without touching a single piece of professional lighting equipment. It’s all about working smarter.
Using Your Everyday Lamps for a Cozy Glow
When the sun goes down or you're stuck with a dreary, overcast day, don't throw in the towel. The secret to getting those warm, inviting interior shots might already be sitting on your nightstands and end tables. Honestly, using the lamps you already have is one of the easiest ways to add a cozy, lived-in feel to your photos. It's what transforms a picture of a room into an invitation.
This isn't about hauling in complicated photography gear. It’s about being clever with what you've got to create a specific mood. Think about it: turning on a bedside lamp instantly makes a bedroom feel more welcoming, like it's ready for a guest to curl up with a book. A well-placed floor lamp can rescue a dim corner, making the whole room feel bigger and brighter.
These little touches of light create what photographers call layers of light. Instead of one flat, boring light source from the ceiling, you get multiple pools of warm light. This adds depth, texture, and a ton of personality to your photos. It’s a simple trick, but the difference it makes is huge.

The Great Bulb Debate: Color and Quality Matter
Okay, here’s where a lot of hosts get it wrong without even realizing it. You can't just flip on any old lamp and expect magic. The type of light bulb you use is critical, and my number one rule is to never mix different color temperatures in the same photo.
Ever seen a picture where parts of the room look warm and orangey while other spots look cold and bluish? That’s what happens when you mix bulbs. Your camera gets confused, and the result is a jarring, unprofessional photo that completely kills the cozy vibe you were going for.
The fix is simple: standardize your bulbs. For any lamps you'll have on in your photos, make sure they all match. Here's what to look for:
- Color Temperature: Stick with bulbs labeled "warm white" or "soft white." You're looking for something in the 2700K to 3000K range, which gives you that classic, comforting glow of an old-school incandescent bulb.
- Color Rendering Index (CRI): This is a big one. Aim for a CRI of 90 or higher. A high CRI means the light shows colors accurately. Your navy blue accent pillows will actually look navy blue, not some weird shade of purple.
- Bulb Type: High-CRI LED bulbs are your best friend here. They're energy-efficient, they don't get blazing hot (a real plus on shoot day), and they provide consistent, beautiful color.
My Pro Tip: Before a photoshoot, I do a quick sweep of the room and replace every single bulb with identical high-CRI, 2700K LEDs. It might cost a few extra dollars, but it guarantees every light source is perfectly matched. The result is a seamless, warm, and cohesive look that makes editing a breeze.
Smart Placement for Maximum Impact
Once you’ve got the right bulbs in, it’s all about placement. You want to create inviting little pockets of light that guide the viewer's eye and show off the best parts of the room. This strategic approach to lighting for photography is what separates amateur shots from listings that pop.
The professional lighting market is exploding—projected to hit $65.32 billion by 2031—largely because LED tech has made great lighting so accessible. For hosts, this means a smart investment in simple LED bulbs can make a space feel 40% more inviting in photos. And with lifespans up to 50,000 hours, they're a no-brainer for your operating costs, too. You can read more about the photography lighting market's growth and its impact.
Here are a few of my go-to placements that work like a charm every time:
- Bedside Lamps: Always, always turn on lamps on both sides of the bed. It creates beautiful symmetry and frames the bed as the cozy, restful centerpiece it should be.
- Living Room Layers: Try combining a floor lamp in a far corner with a table lamp on an end table. This spreads the light around beautifully and avoids that one harsh, flat light source from overhead.
- Kitchen Accents: If you have under-cabinet lighting, turn it on! It’s fantastic for adding depth and making your countertops look sparkling clean.
- Reading Nooks: Have a comfy chair? Put a stylish lamp right next to it. You’ll create a perfect little vignette that just screams, "come relax here with a good book."
By thinking just a little bit like a photographer, you can use the lamps you already own to craft images that feel warm, professional, and absolutely irresistible to potential guests.
Solving Tricky Lighting Scenarios
Every property has them. No matter how well you plan, you'll eventually run into that one tricky spot: the long, dark hallway that feels like a cave, the tiny bathroom with zero windows, or the living room where glare from a bright window ruins every shot of the TV. These are the common headaches that can grind a photoshoot to a halt, but they’re also where a few clever lighting tricks can absolutely save the day.
I've been there. I once spent what felt like an eternity in a rental where a gorgeous floor-to-ceiling window sat directly opposite a big-screen TV. It was a constant battle against reflections. Learning to troubleshoot these real-world problems is what will take your photos from "good enough" to "book now."
This isn't about buying expensive equipment; it's about smart problem-solving. These are the go-to fixes that pros use to turn challenging spots into beautiful features, ensuring your lighting for photography looks amazing across your entire listing.
Conquering Dark and Windowless Spaces
That windowless bathroom or cramped hallway? They're often the toughest rooms to shoot. With no natural light to work with, it’s far too easy for these spaces to come across as dim, small, and unappealing. Your goal is to add light strategically, making the space feel bright without looking artificial.
First, flip on every light you've got—the vanity lights, ceiling fixtures, even the light inside the shower. If it still feels gloomy, you'll need to bring in a little backup. You don’t need pro gear; a simple LED work light or even a bright desk lamp can work wonders.
Here's the secret: bounce the light. Never point an extra lamp directly at what you're shooting. Instead, aim it at the ceiling or a light-colored wall just out of the frame. This turns the entire surface into a huge, soft light source that fills the room much more naturally than a harsh, direct beam. The space will instantly feel bigger and more welcoming.
Eliminating Glare and Reflections
Reflections are the silent killers of great property photos. They pop up everywhere: on TV screens, in mirrors, across glossy kitchen cabinets, and on framed art. The worst part? They often show a reflection of you holding a camera, which immediately looks amateur and shatters the illusion for potential guests.
The solution is almost always about changing your angle. It’s that simple.
- For TVs and Artwork: Don't shoot them head-on. Just move your camera a little to the left or right and angle it back toward the subject. This tiny shift is usually all it takes to make the glare bounce away from your lens and disappear.
- For Mirrors: This is the classic photography puzzle. The best bet is to shoot from a very low angle, aiming up, or from a sharp side angle. By doing this, the mirror will reflect the wall or ceiling instead of you and your camera.
I once spent 20 minutes in a bathroom trying to get a perfect shot of a beautiful vanity without my reflection in it. The fix was ridiculously simple: I put my phone on a tiny tripod on the floor, aimed it up, and used the self-timer. All the mirror reflected was the ceiling—a perfectly clean shot.
Handling High-Contrast Scenes
What do you do with a room that has a super-bright window right next to a dark sofa? That's a high-contrast scene, and cameras (especially on phones) have a hard time with it. Either the window gets completely "blown out" (turning into a blob of pure white) or the sofa becomes a black hole with no visible detail.
There’s a fantastic trick for this built right into your smartphone: the AE/AF lock and exposure slider.
- Frame your shot. Get the composition you want, making sure both the bright window and the dark furniture are in the frame.
- Find a middle ground. Tap and hold your finger on an area of the screen that's not the brightest or the darkest part—a wall or a pillow is usually a good choice. You’ll see a yellow box pop up, which means you’ve locked the auto-exposure and auto-focus.
- Take control of the light. Now, a little sun icon should appear. Simply slide your finger up or down the screen to manually adjust the brightness. Find that sweet spot where the window isn’t blown out and you can still see the details in the shadows.
This little adjustment gives you an incredible amount of control, balancing the light in a way that looks natural and shows guests every part of the room. It’s a tiny action that makes a huge difference.
Getting Your Camera Settings Right
All the beautiful lighting in the world won't matter if your camera settings are fighting against you. You can have a perfectly lit room, but if your photos make your crisp white walls look yellow or your shadows look muddy, you've lost the battle. Let's walk through the settings that make a real difference: white balance, ISO, and exposure.
Getting the colors right is everything, and that’s where white balance comes in. Your camera's "auto" setting often gets confused by mixed light sources—like sunlight from a window and warm lamplight—which can leave you with weird, unnatural color casts. Learning to set this manually is a game-changer.
Manually setting your white balance is the secret to turning photos that feel a little "off" into images that look crisp, clean, and true to life.
Mastering White Balance
Switching to manual white balance means you’re telling the camera exactly what "white" is in that room. You can do this by pointing your camera at something neutral (like a white wall or a piece of paper) or by using presets.
Here are the most common settings you’ll use:
- Daylight: Perfect for rooms flooded with natural sunlight.
- Cloudy: Use this to warm up the cooler, softer light on an overcast day.
- Tungsten: A must-have for rooms lit with standard incandescent bulbs to kill that orange glow.
- Custom Kelvin: For ultimate control, you can dial in the exact temperature, usually from 2500K (very warm) to 6500K (cool daylight).
For a deeper dive, check out our guide on how to choose the right Kelvin setting.
Here’s a quick cheat sheet for common presets:
| Preset | Color Temp (K) | Use Case | Tip |
|---|---|---|---|
| Daylight | 5200 | Sunny windows | Try to avoid the harshness of direct midday sun. |
| Cloudy | 6000 | Soft, overcast scenes | This adds a bit of warmth to counteract cool light. |
| Tungsten | 3200 | Incandescent bulbs | Your go-to for preventing that common orange cast. |
| Custom | Variable | Mixed or tricky light | For best results, use a gray card to get it perfect. |
Balancing ISO and Exposure
For the clean, professional photos that guests love, you want to keep your ISO low. A low ISO gives you sharp, detailed images without any distracting graininess. Once you push your ISO past 800, you start to see that "digital noise" creep in, which can make your photos look cheap.
So, how do you keep the image bright? With exposure compensation.
First, set your camera to a low base ISO—somewhere between 100 and 400 is the sweet spot for most DSLRs. Then, point your camera at the scene and see what the light meter says. From there, you can use the exposure compensation dial to make the image a little brighter or darker until it looks just right.
If you're shooting with your phone, just tap the screen to focus, then lock the AE/AF (auto-exposure/auto-focus). You'll usually see a little sun icon you can slide up or down to fine-tune the brightness. It’s a simple trick for getting more control over your highlights and shadows.
Interestingly, great lighting is becoming more accessible. The market for photography lighting equipment is expected to hit $9 billion by 2033, thanks to better, more efficient LEDs. For hosts like us, that means better tools are available. And the effort pays off: polished, well-lit photos can boost your views and lead to up to 35% more bookings.
Quick Settings Checklist
Before you start snapping away, use this little table as a final check to get your camera ready.
| Setting | Recommended Range | Why It Matters |
|---|---|---|
| ISO | 100–400 | This keeps your photos sharp and minimizes grain. |
| White Balance (K) | 2500K–6500K | Ensures your colors are accurate and natural. |
| Exposure Compensation | ±1 EV | Helps you perfectly balance highlights and shadows. |
Every camera is a little different, so always take a few test shots before you dive into the full photoshoot. Snap a picture, look at it on the screen, and see if the whites are white and the shadows have detail. A tiny tweak to a slider can make a massive difference.
Remember to check your settings again whenever you move to a new room or from inside to outside. Once you get these settings dialed in, your property photos will stand out and grab the attention of your next guest.
The Final Polish for Standout Photos
You've done all the hard work. You staged the rooms, chased that perfect golden hour light, and fiddled with all the right camera settings. But there’s one last step that takes your photos from simply "good" to absolutely unmissable.
Think of it as the final polish. It’s where you take all that fantastic raw material and give it the professional sheen that makes a guest stop scrolling and start booking.
This isn't about slapping on heavy filters or making your rental look like something it's not. It's about smart, subtle enhancements that fix the little imperfections the camera inevitably creates. Even with the best lighting for photography, a lens just can't see a room the same way our eyes do. Post-shoot editing is what closes that gap, making sure the genuine warmth and appeal of your space shines through on the screen.
Your Digital Lighting Expert
I think of photo editing as having a digital lighting expert on call. It's the secret weapon for fixing tricky exposures, correcting weird color casts, and adding that final touch of warmth that makes a traveler feel right at home. This is especially true for those challenging shots where you're battling different kinds of light.
For instance, a skilled editor can work some real magic:
- Balance Windows: They can bring back the beautiful view outside a bright window without plunging the rest of the room into darkness. This is a classic problem that editing solves beautifully.
- Create Color Harmony: They can make the warm light from a bedside lamp and the cool daylight from a window play nicely together, creating a seamless and inviting atmosphere instead of a color clash.
- Add Warmth and Coziness: A few subtle tweaks can introduce a gentle glow, making a living room look like the perfect spot to kick back after a day of exploring.
This final step is what makes all your on-site effort truly count. You did the heavy lifting; this is just the finishing touch that guarantees your listing will shine.
A great photo gets someone to stop scrolling. A professionally polished photo gets them to imagine themselves staying there. That’s where bookings are won.
This is exactly where a service like ours at rental.photos comes into play. We're that final quality check, taking the images you worked so hard to capture and giving them that last bit of professional polish. Our goal is to make every single photo in your gallery look consistently stunning, turning casual browsers into booked guests—all without the time and high cost of a full professional photoshoot.
For more deep dives into making your property look its best, check out the other articles on our rental photos blog.
Your Top Lighting Questions, Answered
After years of shooting properties, I've heard every question in the book about lighting. It’s a topic that can feel overly technical, but it doesn't have to be. Let's cut through the noise and tackle some of the most common questions I get from hosts.
How Many Lights Do I Actually Need?
Honestly, probably just one. My go-to strategy is to start with the best light source you already have—usually a big, bright window—and work from there.
Most of the time, all you need to do is turn on a single, well-placed lamp to add a bit of warmth and fill in any deep shadows. The goal isn't to kill every shadow in the room; you need them to create depth and dimension. A common mistake I see is over-lighting a space until it looks flat, sterile, and washed out. You're trying to create a vibe, not prep a room for surgery.
Should I Bother Using My Camera's Flash?
Please don't. For listing photos, the on-camera flash is your enemy. It's a harsh, direct blast of light that creates hideous reflections on windows, TVs, and artwork. It also casts dark, unflattering shadows that can make a room feel cramped and uninviting.
Sure, professional photographers use complex off-camera flash setups with big umbrellas and softboxes to control the light, but that’s a whole different ball game. For your purposes, sticking to beautiful natural light supplemented by your home's own lamps will give you a much cozier and more authentic feel.
The best lighting is simple lighting. Get really good at using one or two light sources, and your photos will look more professional than someone fumbling with five.
What About an ND Filter? Do I Need One?
You’ll see a lot of photography pros talking about ND (Neutral Density) filters. Think of them as sunglasses for your camera lens—they cut down the amount of light coming in. They're great for very specific creative shots, like getting that silky, long-exposure look on a waterfall in the middle of a sunny day.
But for shooting your rental's interior? Absolutely not. Your problem is almost always getting enough light in, not trying to block it out. Don't waste your money here. Focus on the basics, like timing your shoot for the best natural light and using your lamps to your advantage. Those skills will make a 100% bigger difference.
Still feel like your photos are missing that "wow" factor? Let rental.photos handle the final polish. We specialize in enhancing light and color to create images that make guests want to book immediately. See how our photo editing works and let us make your space shine.
Composed with the Outrank app
Ready to have professional photos?
Our team transforms your existing rental photos into stunning, high-converting images that bring you more bookings. No photoshoot required. 100% refund guaranteed.
Improve My Photos →