A Beginner's Guide to Flat Lighting Photography
Ever scrolled through rental listings and found yourself drawn to a space that just felt right? I know I have. It looked inviting, clean, and honest. Chances are, the secret wasn't some high-end camera but a simple lighting technique I love called flat lighting photography. It's all about smoothing out imperfections and showing off your property's best assets, building trust with potential guests from their very first glance.
The Secret to Bright and Welcoming Photos
Forget those dramatic, artsy shadows that can make a room feel cramped or mysterious. For rental listings, your goal is different. I'm going to dive into why flat lighting is your secret weapon for creating photos that feel open, clear, and spacious. No confusing tech-speak here—just practical advice that turns casual browsers into confirmed bookings.
Why Simplicity Builds Trust
When a potential guest is sizing up your listing, they're looking for one thing above all else: clarity. Flat lighting delivers this by getting rid of harsh shadows and bathing the entire room in soft, even light. The psychological impact of this is huge.
- It feels honest: When every corner of a room is clearly visible, you’re sending a message of transparency. Nothing is hidden in the dark, and that builds immediate trust.
- It creates a sense of space: Shadows can play tricks on the eyes, making a room feel smaller than it actually is. Flat light does the opposite, visually pushing the walls back to make even cozy rooms feel airy and expansive.
- It looks clean and professional: An evenly lit photo just looks polished. It signals that you’re a professional host who cares about the details, instantly setting your listing apart from the crowd.
This isn't a new concept. Photographers started using artificial lights back in the mid-19th century to get this same kind of control, moving beyond the whims of natural sunlight. Today, that same studio-quality effect can be achieved with digital enhancements, which have been shown to boost bookings by up to 35%. You can discover more about the history of lighting in photography to see how far things have come.
Flat lighting is less about making an artistic statement and more about clear communication. Your goal is to show a potential guest exactly what they will get—a bright, clean, and welcoming space to call their temporary home.
To see just how different the guest's impression can be, let's compare the two styles side-by-side.
Flat Lighting vs Dramatic Lighting for Rentals
| Feature | Flat Lighting (Welcoming & Clear) | Dramatic Lighting (Artsy & Risky) |
|---|---|---|
| First Impression | Bright, honest, and spacious. | Moody, artistic, and potentially small. |
| Guest's Feeling | "I know exactly what I'm getting." | "What's hiding in those shadows?" |
| Best For | Showing the entire space clearly. | Highlighting a specific, unique feature. |
| Trust Factor | High. Builds confidence and transparency. | Low. Can feel like you're hiding something. |
This quick comparison makes it clear: for most rental listings, flat lighting is the safer, more effective choice for attracting guests.
Setting the Right Expectations
At the end of the day, flat lighting photography is about setting accurate, appealing expectations. When a guest arrives and finds the space is just as bright and inviting as it looked online, you’ve already won. You're not just renting out a room; you're selling the feeling of a comfortable, stress-free getaway.
By mastering this simple but powerful lighting style, you're laying the groundwork for a five-star review before your guest even walks through the door. It’s all about showing your property in its best possible light—without any tricks or exaggeration.
Understanding Flat Lighting Photography
Let's break down what flat lighting photography actually is. Picture the light on a slightly overcast day. It’s bright and even, and it seems to wrap around everything, softening all the hard edges and shadows. That’s the whole idea right there. In photography terms, it just means your main light source is pointed straight at your subject, right from near the camera’s position.
This simple shift is a complete game-changer for interior photos. Its biggest superpower is killing distracting shadows that can hide important details, make a room feel smaller, or just create a gloomy, uninviting vibe. When you fill a room with even light, every corner becomes visible, clear, and welcoming.
The Power of Even Illumination
So why does this matter so much for a rental listing? When a potential renter sees a photo with flat lighting, their brain almost instantly registers it as clean, honest, and spacious. It also helps colors look true to life and vibrant, creating a modern, accessible feel that people are naturally drawn to. You're not just showing a room; you're selling a feeling of comfort and trust.
Forget getting bogged down in technical settings for a moment. The real goal is to build an intuition for what makes a room look great on camera. Once you grasp this core concept, you'll start seeing light differently and know exactly how to make any space feel bright and fantastic. If you want to dive deeper, our general guide to the fundamentals of lighting for photography is a great next step.
The magic of flat lighting is that it subtracts distractions. It gets rid of confusing dark spots and harsh lines, letting the true character and features of your space shine through.
This approach is popular well beyond real estate, too. Flat lighting has become a go-to for professional headshots over the last decade, with around 40% featuring almost no cast shadows. The technique smooths out unflattering lines by evening out the brightness across a person's face. For Airbnb hosts, this has the same effect as professionally enhanced photos; services like rental.photos apply similar principles to create that same even, cozy glow. In fact, Airbnb’s own data shows that listings with balanced, flat-toned images see 20-35% more bookings because guests perceive the rooms as brighter and bigger. You can learn more about the techniques behind shadowless lighting to see how the pros do it.
What Flat Lighting Does for Your Photos
So, what are the real, tangible benefits you'll see in your listing photos when you use this technique? It all comes down to a few key improvements that directly influence how potential renters see your property.
- Minimizes Imperfections: Just like soft light can be flattering for a portrait, it can also smooth over minor scuffs on a wall or worn spots on a floor. It shows your space in its best light without being deceptive.
- Makes Colors Pop: Harsh shadows can make colors look dull or create weird color casts. Flat light lets the true hues of your decor—those vibrant throw pillows or warm wooden floors—look accurate and appealing.
- Shows Off the Details: Renters want to see everything. They’re looking at the texture of the bedding, the pattern on the rug, and the quality of the furniture. Flat light makes sure these valuable details aren't lost in the dark.
- Creates a Consistent Look: Using a flat lighting approach for all your photos gives your entire listing a cohesive, professional feel. This kind of consistency tells guests you’re a host who cares about the details.
By embracing this style, you’re not just taking pictures. You’re crafting an experience that begins the moment someone lays eyes on your listing.
How to Create Flat Light With Simple Gear
You don’t need a Hollywood-sized budget or a truck full of equipment to get those stunning, bright photos for your rental listing. I’m going to walk you through a few of my favorite, dead-simple setups for creating beautiful flat lighting photography with gear you probably already have. This is all about working smarter, not harder.
The whole idea is to place your light source in front of whatever you're shooting, right near your camera. This fills in all the shadows from the front, giving you that clean, even look. This little graphic breaks it down perfectly.
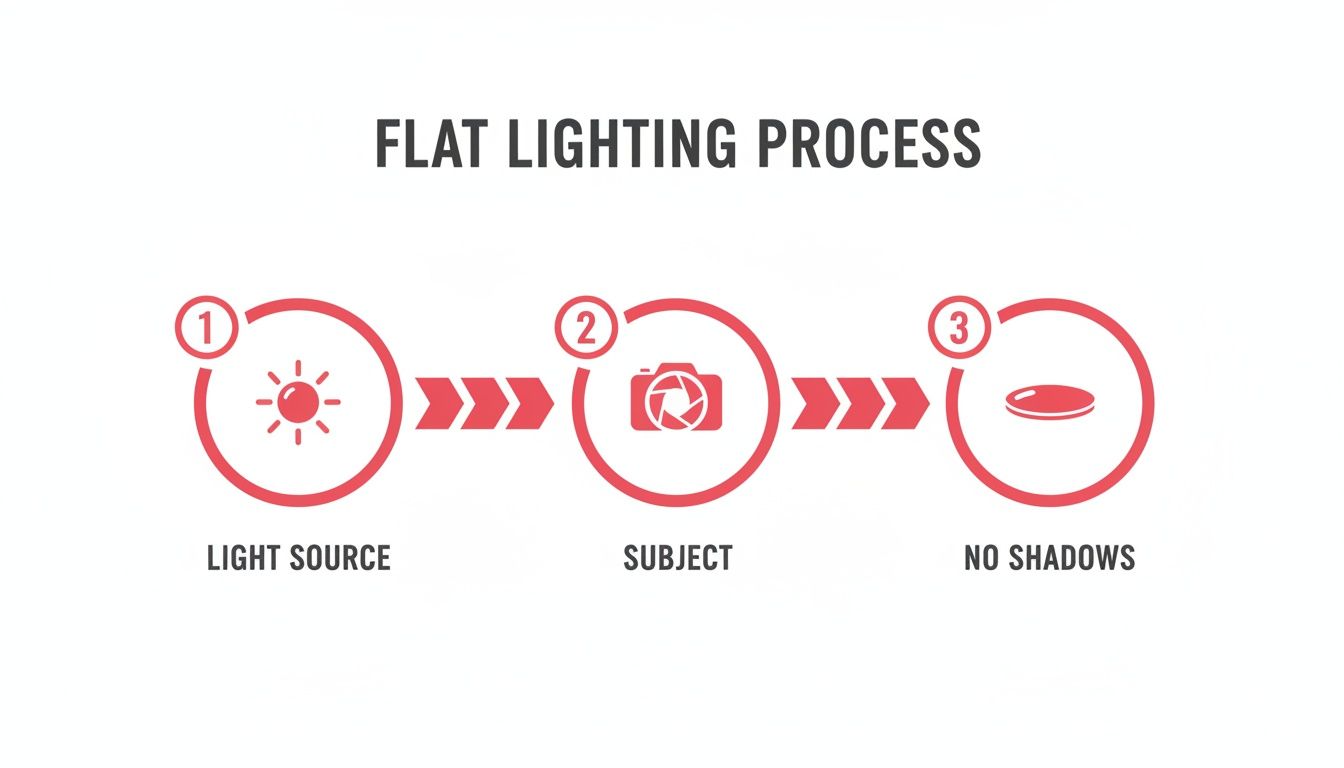
See? It’s pretty straightforward. The light source sits behind the camera, washing over the subject and erasing shadows. Now, let’s see how to make this happen in the real world.
Method 1: Use Natural Light From a Window
Your best and cheapest light source is that giant, soft light in the sky—the sun. The trick is just to tame it. Think of a large window as a massive, free softbox that casts gorgeous, even light across a room.
Here's how to put it to work:
- Kill the Interior Lights: First things first, turn off all the lamps and overhead lights. When you mix daylight with artificial light, you often get strange color tints that are a pain to fix later.
- Get in Position: Stand with your back to the largest window in the room. You want that natural light flowing right over your shoulder and onto the scene you're shooting.
- Time It Right: Try to avoid times when harsh, direct sunlight is blasting through the window. The best light is usually mid-morning or late afternoon when it's bright but not direct. An overcast day is even better—the clouds act like a giant diffuser, creating perfectly soft, flat light for free.
Honestly, this simple setup is often all you need. Putting the window behind you creates classic flat lighting that makes any room feel bright and airy.
Method 2: Bounce a Single Flash or LED Light
What if natural light isn’t an option? Maybe you’re shooting at night or in a room with tiny windows. No problem. A single, cheap flash or a continuous LED light can do the job, but here’s the secret: never point it directly at your subject. Direct flash is what creates those harsh, ugly shadows we’re trying to eliminate.
Instead, we’re going to bounce it.
By bouncing your light off a big, neutral-colored surface (like a white ceiling or wall), you effectively turn that whole surface into a new, much larger light source. And a bigger light source always creates softer light.
Here’s how it’s done:
- Find Your Surface: Look for a large, white or light-gray ceiling or wall. Steer clear of colored walls, because they’ll cast that color all over your room (a yellow wall will make your photo look yellow).
- Angle Your Light: Aim your flash or LED light up at the ceiling at about a 45-degree angle, or point it sideways at a nearby wall.
- Take the Shot: The light will hit the surface, spread out, and then rain down softly and evenly over the entire room. It beautifully mimics the light from a big window and is a fantastic way to create flat lighting. If you want to get really good at this, you can learn more about using bounce boards and surfaces in photography to dial in your technique.
Method 3: Use a Couple of Household Lamps
No flash? No problem at all. You can get a surprisingly great result using two ordinary lamps you already own. The key is to use their light to create a balanced, shadow-filling effect.
- Pick Your Lamps: Grab two lamps that are about the same height and brightness. Table lamps or floor lamps work perfectly. If you can, make sure they have bulbs with the same color temperature (e.g., both "daylight" or both "soft white").
- Set Them Up: Place one lamp on each side of your camera, just a bit behind where you’re standing. You want them at roughly the same angle and distance from your camera.
- Aim for Evenness: Turn on the lamps and point them toward the room. The goal is for the light from both lamps to overlap in the middle, filling in any shadows created by the other. This creates a wonderfully balanced, flat light that makes your space look incredibly inviting.
With any of these simple methods, you can get that professional, welcoming look of flat lighting photography without spending a dime on new gear. It's all about understanding the light and using what you've got.
Staging Your Space to Maximize Light
You can have the best lighting in the world, but it won’t do you any good if the room itself isn't ready for its close-up. Think of your lighting and your staging as a team—they have to work together perfectly. This isn't just about a quick tidy-up; it's about preparing your space to be an active partner with the light, not an obstacle it has to fight.
I'll walk you through some of my go-to staging tricks, like arranging furniture to create that wide-open feeling that flat lighting photography just loves. We'll also see how simple things, like a few light-colored pillows, can act like mini light reflectors, bouncing brightness around the room and making everything feel bigger and more inviting.
Declutter and Depersonalize Your Space
First things first: before you even think about moving furniture, you have to declutter. This step is absolutely non-negotiable. Clutter creates visual "noise" and hundreds of tiny, distracting shadows that completely undermine the smooth, even look you're trying to achieve.
Get rid of personal items—family photos, mail on the counter, your kid's art on the fridge. The goal is a clean, neutral canvas that allows a potential guest to easily imagine themselves living in the space. This simple act of subtraction instantly makes a room feel larger and more peaceful in photos.
Arrange Furniture to Create Flow
With the clutter gone, it’s time to look at your furniture. Don't just leave everything pressed up against the walls where it usually sits. For your photos, you want to create a sense of spaciousness and an easy, walkable path through every room.
- Pull furniture away from walls: Even just six inches can make a huge difference. Pulling a sofa or chair off the wall creates a subtle separation that makes a room feel less boxed-in.
- Open up walkways: Make sure there are clear, wide paths from one end of the room to the other. On camera, this translates to a space that feels open and easy to navigate.
- Angle key pieces: Sometimes, turning a chair slightly toward a window or the center of the room makes the layout feel more dynamic and welcoming than a rigid, squared-off arrangement.
It’s a lot like landscape photography, where photographers love overcast days because the flat light reveals amazing detail. This kind of light can cut down on glare by up to 70%, which lets the natural textures of a space shine through without harsh shadows. For rental owners, this is a game-changer. Properties with clear, glare-free photos have been shown to convert up to 28% better because guests trust the realistic, calm vibe. If you're curious, you can learn more about the importance of flat light in other applications.
Use Textiles to Soften and Brighten
This is one of my favorite little staging secrets. Textiles are your best friend when it comes to manipulating light and adding a touch of cozy elegance.
Think of every light-colored surface as a small bounce board. A white duvet, a cream-colored throw blanket, or light gray pillows all catch the light from your window or lamps and gently reflect it back into the room, filling in any remaining subtle shadows.
To help you get your room photo-ready, I've put together a quick checklist.
Staging Checklist for Flat Lighting Success
Here’s a simple checklist to run through before you start shooting. These small tweaks make a huge impact on your final photos.
| Area | Action Item | Why It Helps Flat Lighting |
|---|---|---|
| Bed | Use crisp, light-colored bedding (white, beige, or pastels). | Acts as a large, soft reflector, brightening the entire room. |
| Sofa/Chairs | Drape a light-colored throw blanket over the side. | Breaks up large dark surfaces and bounces light upward. |
| Windows | Open blinds and use sheer or light curtains. | Maximizes the amount of natural light entering the space. |
| Floors | Use a light-colored area rug if floors are dark. | Brightens the lower half of the room and adds soft texture. |
By making these small adjustments, you’re not just decorating—you’re actively shaping the light to get the best possible photos. A well-staged room doesn’t just look good; it feels good, and that feeling is what convinces a guest to click "Book Now."
Simple Edits to Enhance Your Final Photos
Taking the picture is just the first step. The real magic—that final bit of polish that makes a photo look truly professional—often happens in post-processing. But don't worry, you don't need to be a graphic design expert to make a huge impact. A few simple tweaks can perfect the bright, welcoming feel of your flat lighting photography.
These quick edits can be done in free or budget-friendly apps right on your phone or computer. The idea isn't to completely change the photo. It’s about enhancing the great work you've already done to ensure the final image is as clean, clear, and inviting as possible.
Fine-Tuning Brightness and Exposure
Even with the best lighting setup, your camera might not capture the scene exactly how your eyes see it. More often than not, photos come out a little darker than you'd like. This is where your first and most important edit comes into play.
Start by adjusting the overall exposure or brightness. Just nudge the slider up enough to make the room feel bright and airy. Be careful not to "blow out" the highlights, which is when bright areas like windows lose all their detail and just become solid white blobs.
Next, take a look at the shadows. Flat lighting is great at minimizing them, but some might still be a little too dark. Use the shadows slider to gently lift them, which helps reveal the details hiding in the corners of the room. This one adjustment can make a space feel significantly larger and more open.
Getting the Colors Just Right
Color has a massive impact on how inviting a space feels. Sometimes a camera gets it slightly wrong, making your crisp white walls look a little yellow or your cozy lamps feel a bit blue. This is a white balance issue, and thankfully, it's a simple yet powerful fix.
The goal with color correction is straightforward: make the colors in your photo look natural and true to life. You want that white bedding to actually look white, and for the warm wood floors to keep their rich, natural tone.
Most editing apps give you a temperature (or warmth) slider and a tint slider.
- Temperature: If your photo looks too yellow and "warm," slide this toward the blue end of the scale. If it looks too blue and "cold," slide it back toward yellow.
- Tint: This slider adjusts the green and magenta hues. It’s a more subtle tool you can use if the colors still feel a little off after you've set the temperature.
Nailing the colors is crucial. If you want to dive deeper, check out our detailed guide on what white balance is in photography and how to get it right every time.
When to Stop Editing
Knowing when to stop is just as important as knowing what to edit. The goal here is a natural, believable photo, not something that looks overly filtered or artificial. After you make your adjustments, it’s a good idea to step away for a minute and then look at it again with fresh eyes. If anything jumps out as looking "off" or fake, you've probably pushed an edit too far.
For hosts who want that perfect, consistent look across an entire listing but don't have hours to spend editing, a professional service can be a lifesaver. A service like rental.photos handles all these subtle adjustments for you. Their expert editors make sure every photo has flawless lighting and color, giving you a polished, high-end finish that builds guest trust and, most importantly, saves you a ton of time.
When to Use a Different Lighting Style
While flat lighting photography is your go-to for making spaces feel bright, open, and easy to understand, it’s not the only tool you should have in your box. There are moments when a room's best features actually need a little shadow and mood to truly shine.
Think of it this way: flat light gives a potential guest the clear, honest facts about a room's size and layout. But other lighting styles can whisper about its personality and character. Knowing when to switch gears can make your listing gallery feel much more dynamic and complete.
You aren't giving up on clarity. You're just strategically adding a touch of drama where it counts the most, showing off the unique, atmospheric corners that make a property feel special.
Highlighting Texture and Architectural Details
Flat lighting is fantastic because it smooths everything over, hiding minor scuffs on the wall or imperfections in the floor. But that same quality can unfortunately flatten out beautiful textures you want people to see. Got a stunning exposed brick wall, a rustic stone fireplace, or heavy wooden beams? This is where directional light is your best friend.
When a light source comes from the side—what we photographers call sidelight—it rakes across these surfaces. This creates tiny shadows that pop the texture and reveal its depth. A flatly lit photo can make a brick wall look like wallpaper; a sidelit photo makes you feel like you could reach out and touch it.
Using directional light for texture is like running your hand over a unique surface. It emphasizes the tactile quality of a feature, making it far more memorable for guests who appreciate craftsmanship and character.
Creating Mood and Atmosphere
Not every photo in your listing needs to scream "bright and airy!" Sometimes, the goal is to create a feeling of coziness, romance, or pure relaxation. This is where you can intentionally use shadows to set a specific mood.
Think about these situations where a different lighting style tells a much better story:
- The Cozy Fireplace: Don't blast the room with light. Instead, take a shot in the evening with the fireplace as the main light source. The warm, flickering glow creates an incredibly inviting scene that flat light could never capture.
- A Balcony Sunset: Fighting to brighten the foreground to match a brilliant sunset is a losing battle. Let the dramatic colors of the sky be the star, maybe even silhouetting the patio furniture. You're not just selling a balcony; you're selling the experience of watching the sunset from that exact spot.
- A Movie or Game Room: A slightly darker, moodier photo of a home theater with its own ambient lighting feels way more authentic and exciting than a brightly lit one. It helps people instantly imagine themselves settling in for a movie night.
Learning to balance bright, clear shots with a few moody, atmospheric ones tells the full story of your property. It shows guests that your space isn't just a functional place to stay—it's a memorable destination with its own unique charm.
Common Questions About Flat Lighting
Diving into a new photography technique always brings up a few questions. I've been helping hosts with their photos for years, and a few key queries about flat lighting photography pop up time and time again. Let's clear the air with some simple, straight-to-the-point answers.
Can I Really Get Good Flat Lighting with Just My iPhone?
You absolutely can. Modern smartphone cameras are fantastic, but the real secret isn't the camera itself—it's how you manage the light hitting your subject. You don’t need a bunch of expensive equipment, just a smart approach.
Your best friend here is natural light. Whenever you can, stand with your back to a big window and let that soft light flood the room ahead of you. Flip on all the lights in the room, too; this helps fill in any stubborn dark corners. Before you take the shot, just tap on your phone's screen and slide the exposure up to brighten the scene. The one thing to avoid at all costs is your phone’s built-in flash—it creates the exact harsh, ugly shadows we’re working so hard to get rid of.
Will Flat Lighting Make My Property Look Boring or Sterile?
That's a valid concern, but the answer is a firm no—as long as you stage the room thoughtfully. The point of flat lighting isn't to zap every shadow out of existence and create a clinical white box. It's about softening the harsh, distracting shadows that can hide your property's best features.
Visual interest comes from smart staging, not dramatic lighting. This is where you bring in the personality! Use colorful pillows, cozy throw blankets, and a few well-placed plants to add warmth and life. Flat lighting gives you a clean, clear canvas that makes those thoughtful details the center of attention. It’s all about showing off your space honestly and letting your decor tell the story.
A common misconception is that flat light is boring. In reality, it’s a supporting actor that lets your well-staged room be the star of the show. It provides clarity so your property's best features can shine.
How Is Professional Photo Enhancement Different from an Instagram Filter?
They're in completely different leagues. Think of an Instagram filter as a one-size-fits-all preset. It just slaps a uniform look over your entire picture, which can often distort colors, hide important details, and make your photos feel unnatural or even misleading.
Professional photo enhancement, on the other hand, is a meticulous, hands-on process done by a skilled editor. They'll go in and selectively brighten specific areas of the photo, fix the distortion that wide-angle lenses create, and carefully balance the colors to make sure they look exactly like they do in real life. It’s a custom-tailored edit for each individual photo, designed to make your property look its very best while keeping it totally natural.
If you're ready for bright, professional, and inviting listing photos without the steep learning curve, rental.photos can help. Our team of pro editors will polish your images to perfection, delivering that bookable look in under 24 hours. Learn more and get started at rental.photos.
Ready to have professional photos?
Our team transforms your existing rental photos into stunning, high-converting images that bring you more bookings. No photoshoot required. 100% refund guaranteed.
Improve My Photos →