Your Secret Weapon for More Bookings: Floor Plans and Photography
Let's be real for a minute. Pairing great photos with a solid floor plan is probably one of the most powerful things you can do for your rental listing. It's the one-two punch that gives potential guests a complete, trustworthy picture of your property. The photos create that initial "wow" factor, while the floor plan gives them the logical information they need to book with total confidence.
Why Your Listing Needs More Than Just Great Photos
You’ve poured your heart (and probably a lot of hours) into making your rental look its absolute best. The photos are gorgeous, the lighting is perfect, and every corner looks like it's straight out of a magazine. But are you telling the whole story? As crucial as professional photography is, it’s really only half of what makes a listing truly stand out.
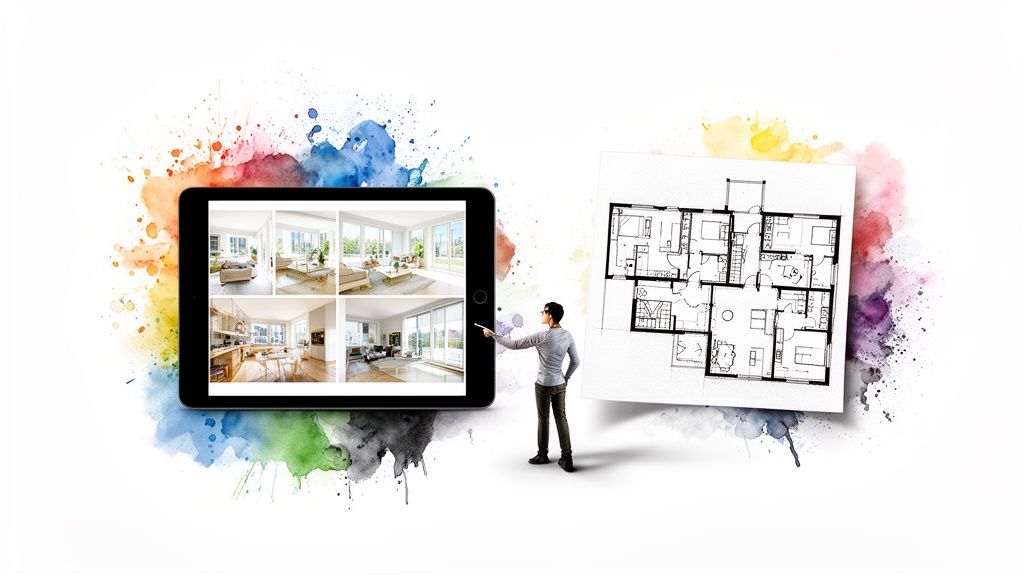
Without a floor plan, you're leaving guests to connect the dots on their own. I like to call this the "imagination gap." They're scrolling through your pictures, trying to mentally map out the space. Is the kids' room right next to the master? How far is the patio from the kitchen? This kind of guesswork creates uncertainty, and believe me, uncertainty is a booking killer.
Bridging the Imagination Gap
I learned this lesson the hard way. Early on, I had a listing with a beautiful downstairs bedroom, but the photos didn't clearly show where it was in relation to the main living area. A family booked, thinking it was all connected, and ended up leaving a disappointed review about the "weird layout." It stung, but they were right. A simple floor plan would have set their expectations correctly from the start.
Floor plans build instant trust because they’re completely transparent. They let guests see themselves in the space and answer critical questions before they even think to ask:
- Flow and Function: Can our family move around easily here? Does the layout work for us?
- Privacy: Where are the bedrooms? Are they far enough apart from the noisy living room?
- Accessibility: Will this space be easy for everyone in our group to navigate?
When you provide a floor plan, you’re doing more than just showing a property. You’re handing them the keys to mentally move in and start planning their trip. That clarity removes doubt and makes it so much easier for them to hit that 'book now' button.
This mix of beautiful images and practical, clear information is a game-changer. We've seen data showing that real estate listings with professional photos sell 32% faster and for more money. That same principle absolutely applies to our world of rentals. A complete visual package is essential if you want to command higher rates and keep your calendar full. You can find out more about the impact of professional visuals on real estate trends and see just how it can boost your own rental's success.
Setting the Stage for Perfect Photos and Floor Plans
Before you even think about picking up a camera or a tape measure, the real work begins. I promise, a little prep work upfront makes a world of difference, turning a potentially frantic day into a smooth, professional shoot. This is all about getting your property camera-ready for both knockout photos and precise floor plans.
Think of it like setting the stage for a play. A cluttered, messy set distracts from the story. It's the same for your property. The goal is to make every room feel bright, spacious, and inviting, letting its best qualities take center stage.
Staging for Success
Staging isn’t about faking it; it's about showcasing a room's true potential. You want potential guests to mentally move in the second they see the photos. For me, that always starts with decluttering every single surface. Get rid of personal photos, knick-knacks, and anything that makes a space feel small or overly personal.
Here are a few simple tricks that have a huge impact:
- Clear the Counters: In the kitchen and bathrooms, remove everything from the countertops. You can leave one or two nice touches, like a small plant or a bottle of hand soap, but that's it.
- Tidy the Bedrooms: A perfectly made bed with crisp sheets and fluffy pillows is non-negotiable. Nightstands should be clear, holding nothing more than a simple lamp.
- Let There Be Light: Open every blind and curtain. Clean the windows until they sparkle. Natural light is your best friend in photography and can make a space feel twice as big. For a deeper dive, check out our guide on mastering lighting for photography.
My go-to rule is to take out about 50% of the decor in any given room before I start shooting. It might feel a little empty when you're standing in it, but on camera, it looks clean, spacious, and perfectly balanced. This lets the home’s real selling points—like a great view or gorgeous hardwood floors—truly stand out.
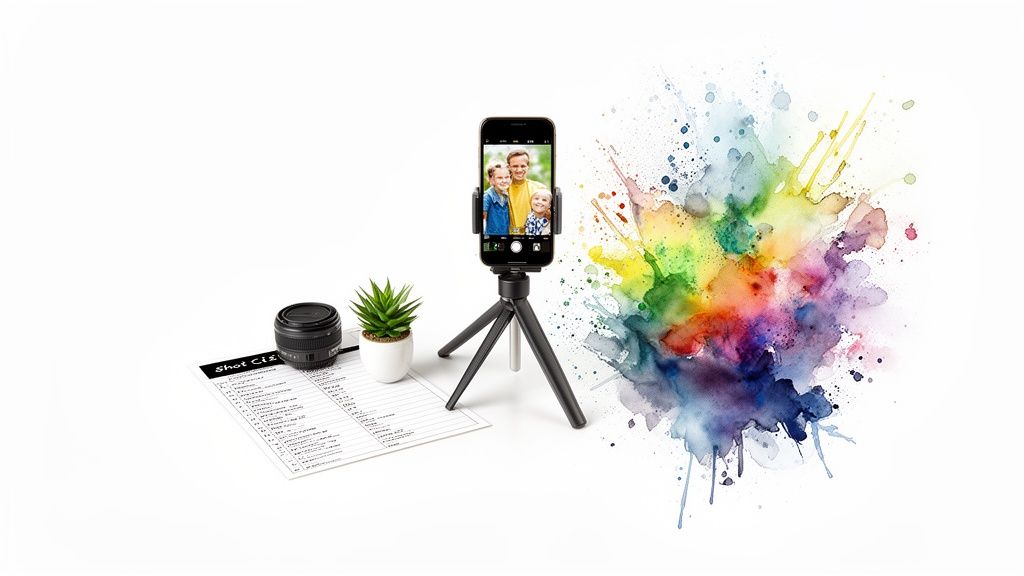
Your Essential Shot List
Walking into a photoshoot without a plan is a classic rookie mistake. We've all done it. You’ll inevitably forget important shots or waste time figuring out what to do next. A solid shot list is your roadmap to capturing everything that matters to a potential guest.
Think beyond just "a picture of the bedroom." Get specific.
Your shot list absolutely must include:
- Wide-Angle Views: Capture at least two wide shots of every key room (living area, kitchen, bedrooms). Shooting from different corners gives a much better sense of the space and layout.
- Feature and Amenity Shots: Get close-ups of the little things that make your place special. Is it a high-end espresso machine, a smart TV, a cozy fireplace, or the thoughtful welcome basket you provide? Shoot it.
- The Practical Spaces: Don’t skip the laundry room, pantry, or even a well-organized closet. These shots build trust and show guests you’ve thought about practical needs like storage.
- Connecting Views: I love taking shots that show the flow between rooms—like a view from the living room looking into the kitchen. These help people mentally connect the dots of the layout before they even see the floor plan.
As you're walking through the property and staging, start thinking about the floor plan. Grab a notepad and sketch a quick, rough layout. Mark where the doors, windows, and major furniture are. This simple act makes measuring for the final floor plan so much easier and ensures your photos and floor plans tell the same cohesive story.
Creating Your Floor Plan: From DIY Sketch to Digital Tool
The idea of creating a floor plan might sound a bit daunting, but trust me, it's easier than you think. You don't need to be an architect or buy expensive software to create something that brings immense value to your listing. The goal here is simple: give potential guests a clear, easy-to-read layout of your property.
The easiest way to start? A good old-fashioned hand-drawn sketch. All you need is a pencil, paper (graph paper works wonders), and a tape measure. A clean, legible drawing that’s roughly to scale is often more than enough to be effective.
This simple flowchart shows how measuring your space fits right into the same prep work you're already doing for your photoshoot.

As you can see, measuring the space is just another part of the same workflow as staging the room and planning your photo shot list.
From Paper Sketch to Polished Plan
Once you have your measurements and a rough sketch on paper, you can either tidy it up for a neat, handmade look or step it up a notch with a digital tool. There are plenty of free and low-cost apps designed to turn that hand-drawn diagram into a professional-looking digital floor plan.
These tools are built for people like us, not architects. Most have a simple drag-and-drop interface for walls, doors, and furniture. Some of the newer apps even use your phone’s camera to scan a room and generate a layout for you.
Here are a few popular options that I've found offer a great mix of user-friendliness and high-quality results:
- Magicplan: This app is a game-changer. It uses your phone's camera to measure and draw your floor plan in just a few minutes, making it incredibly intuitive for a quick and accurate layout.
- Roomle: A fantastic choice if you want to create both 2D and 3D floor plans. The large furniture library is a huge plus, as it really helps guests visualize how they'll use the space.
- Floorplanner: This is a browser-based tool that's super easy to learn. Its simple interface makes drawing plans from scratch a breeze for anyone.
That small investment of time to go digital really pays off. It makes your entire floor plans and photography package feel cohesive and thoughtfully put together.
Choosing Your Floor Plan Creation Method
Not sure which path to take? It really comes down to your budget, available time, and how comfortable you are with technology. Here’s a quick breakdown to help you decide.
| Method | Best For | Cost | Time Investment | Skill Level |
|---|---|---|---|---|
| DIY Sketch | Those on a tight budget or needing a quick, simple solution. | Free | 1-2 hours | Basic |
| Digital Apps | Hosts who want a professional look without the professional price tag. | Free to ~$30/month | 2-4 hours | Beginner-Intermediate |
| Hire a Pro | Busy hosts or those with large/complex properties who want a flawless, hands-off result. | $75 - $200+ | Minimal | None |
Ultimately, the best method is the one you'll actually do. A simple, clean sketch is infinitely better than no floor plan at all.
When to Call in a Professional
Of course, you can always hire someone to do it for you. If you're pressed for time or just want a guaranteed high-quality result without any hassle, bringing in a pro is a great investment. Many real estate photographers even offer floor plan creation as an add-on service, which is super convenient.
The key takeaway is to choose the method that fits your budget and comfort level. Whether it's a neat hand-drawn sketch or a professional 3D rendering, having any floor plan is better than having none at all. It provides clarity that photos alone can't match.
Surprisingly, this is a massively overlooked opportunity. Across the wider real estate market, floor plans were included in only 4.3% of photography orders. This gives you a huge advantage. By providing a complete picture of your property, you can easily stand out from the competition. You can read more about these real estate photography trends and see just how far ahead of the curve you can get.
Mastering Your Rental Photography
With the property staged and your plan in hand, it's time for the fun part—bringing it all to life through photography. And let me tell you, you really don't need a high-end DSLR to get stunning results. Modern smartphones have incredibly capable cameras, and the real secret to great photos lies in understanding light, composition, and angles to make every room feel spacious and inviting.
Let me be clear: natural light is your absolute best friend. I always plan my shoots for daytime, ideally on a bright but slightly overcast day, which gives you beautiful, soft light without harsh shadows. Before you take a single picture, open every blind and turn on every light. This layering of light sources creates a warm, ambient glow that makes a space feel vibrant and lived-in.
When you're framing your shots, try shooting from a corner. It’s a simple trick that instantly makes rooms feel larger and more open. Shooting straight-on from a doorway, on the other hand, can make the same room feel boxed in. Also, watch your camera height. A common mistake is shooting too high or too low. I’ve found that holding the camera around chest level—about four feet from the ground—gives the most natural and appealing perspective, almost like you’re walking into the room yourself.
Your Go-To Shot List for Every Listing
To make sure you don't miss anything, it helps to work from a consistent shot list. You want to give potential renters a complete tour, which means a mix of wide shots that show the space and detail shots that show the personality.
Here’s a checklist of must-have shots that I use for every property:
- Wide-Angle Room Views: For every main room (living room, kitchen, bedrooms), grab at least two wide shots from different corners. This gives people a real feel for the size and layout.
- Detail and Amenity Shots: What makes your rental special? Zoom in on those things. It could be the high-end espresso machine, the plush bedding, or the smart TV. These are the little luxuries that seal the deal.
- Connecting Views: I love taking photos that show the flow between rooms, like a shot from the kitchen looking into the living area. These photos subconsciously reinforce the layout you'll be showing in your floor plan.
- Exterior and Neighborhood Shots: The experience doesn't end at the front door. Snap some photos of the entrance, backyard, or patio. If there are cool local spots nearby, capture those too to help guests imagine their entire trip.
The Magic of Post-Production
Snapping the photo is just the beginning. The real magic often happens during editing, but let's be honest, this is where most people get bogged down. Who has the time to master complex editing software? I know I don't.
This is where professional photo enhancement services become a game-changer for hosts. Instead of wrestling with color correction and brightness settings for hours, you can pass your images off to people who do this all day, every day. They can balance the colors, brighten up dark corners, and make sure every single photo in your gallery has a consistent, polished look.
A small investment in professional editing can bring a huge return. It’s not about misrepresenting the property; it’s about presenting its true character in the most appealing way. Time and again, consistently beautiful images have been proven to attract more views and more bookings.
At the end of the day, you need high-quality images that are perfectly optimized to catch a renter's eye. Using a dedicated real estate photo editor not only saves you a ton of time but also delivers photos that build trust and reflect your property’s best self. It's a simple, efficient way to elevate your listing’s visual appeal without needing any technical skills, freeing you up to focus on being a great host.
Bringing It All Together: Telling a Story with Your Visuals
You've put in the work. Your photos look fantastic, and you've got a crisp, accurate floor plan. Now comes the fun part: weaving these two elements together to tell a story that doesn't just show your property, but sells the experience of staying there.
Don't just tack the floor plan on at the end of your photo gallery. That’s a huge missed opportunity. Think of your floor plan as the map that gives context to all the beautiful scenery in your photos. Its placement is a strategic choice.
From what I’ve seen work best, the sweet spot is placing the floor plan as the second or third image. This move immediately answers the layout questions that pop into a potential guest's head as they're admiring your stunning shots of the living room or kitchen. It sets the stage for the rest of their virtual tour, letting them mentally place each room as they click through the photos.
Weave a Narrative with Your Captions
Your property description and photo captions are where you can really bring the space to life. This is your chance to act as a virtual tour guide, connecting the dots between your floor plans and photography in a way that feels personal and helpful.
Instead of a flat, boring caption like "Primary Bedroom," use the floor plan to add context and highlight a key benefit.
Here are a few real-world examples:
- For a bedroom photo: "The spacious primary suite (check out the floor plan to see the layout) features a king-size bed and has its own private balcony access."
- For a kitchen photo: "Our fully-equipped kitchen opens right into the main living and dining area, creating a perfect social hub for your whole group."
- For a unique feature: "Tucked away for privacy, the dedicated office is located at the far end of the hall, offering a quiet spot for remote work (you can see its location on the layout)."
This simple technique does so much more than just describe a room—it helps people imagine how they will use the space. You're getting ahead of their questions and building the kind of confidence that turns lookers into bookers. You can take this even further by creating truly immersive walkthroughs. We cover this in-depth in our guide to 3D photography for real estate.
When you reference the floor plan in your descriptions, you transform a simple diagram into a dynamic tool. Guests aren't just looking at pictures anymore; they're mentally walking through your home, picturing where they’ll have morning coffee or which room is best for the kids.
Technical Specs for a Flawless Display
Finally, let’s quickly cover the technical details. Nothing kills a great first impression faster than a blurry image or a listing that takes forever to load.
For both your photos and floor plans, just stick to these simple rules:
- File Type: Use JPEG for your photos. It offers the best mix of quality and file size. For floor plans, which are all about sharp lines and text, PNG is usually the better choice because it keeps everything looking crisp.
- Resolution: Aim for at least 2000 pixels on the longest side for all your images. This ensures they look great, even when someone zooms in to get a closer look.
- File Size: Keep each file under 1 MB. This is key for fast loading times, especially on mobile. Most booking sites will compress your images anyway, but starting with an optimized file gives you a much better result.
Getting these little details right ensures your entire visual package looks polished and professional, no matter what device your future guests are using.
Common Questions About Rental Photos and Floor Plans
Even with a solid plan, you'll probably still have a few questions about getting your photos and floor plans just right. Let's dig into some of the ones I hear most often from other property owners.
Do I Really Need a Floor Plan if I Have Great Photos?
Yes, you really, really do. While your amazing photos create that initial "wow" factor, a floor plan provides the logical clarity that pictures just can't. Photos show the style; floor plans show the substance.
A floor plan answers all those practical questions running through a guest's mind: Does the master bedroom connect to the patio? Is the kids' room right next to the living area? How does the whole space flow? It helps them mentally "move in" and builds trust that what they see is what they'll get.
Think of them as the perfect team: your photos inspire the dream, and your floor plan confirms the reality.
Where Should I Place the Floor Plan in My Photo Gallery?
This is a great question. In my experience, the sweet spot is right after the hero shots of the main living area and kitchen. This usually makes it the third or fourth image in your gallery.
Why there? You've already hooked them with beautiful images of the key spaces. Now, just as they're trying to piece it all together in their heads, you give them the blueprint. This placement helps them make sense of the remaining photos and understand the complete layout from the get-go.
Think of it as giving your guests a map right after they’ve seen the main landmarks. It makes the rest of their virtual tour much more meaningful, cuts down on confusion, and gives them the confidence to click "book."
Can I Use a Simple Hand-Drawn Sketch for My Floor Plan?
Absolutely, as long as it’s neat and easy to read. A clean, simple sketch is way better than having no floor plan at all. Just be sure to use a ruler, write clearly, and take a photo of it in good, even light.
That said, taking an extra ten minutes to plug your sketch into a free app will give your listing a much more professional look. It’s a small effort for a big upgrade.
Is It Worth Paying for Professional Photo Editing?
For almost everyone, the answer is a resounding yes. Professional editing is so much more than just applying a filter. A good editor will correct lens distortion, balance colors across all photos, and make every room look bright and inviting, even on a cloudy day.
It's a small investment that saves you a ton of time and delivers a polished, cohesive gallery. That professional touch can directly lead to higher booking rates and justify a better nightly price, paying for itself many times over.
Ready to make your rental listing's photos look their absolute best? rental.photos delivers professionally enhanced, booking-ready images in under 24 hours. Just upload your photos and let our team of expert editors do the rest, so you can stand out and secure more stays. Get started with rental.photos.
Ready to have professional photos?
Our team transforms your existing rental photos into stunning, high-converting images that bring you more bookings. No photoshoot required. 100% refund guaranteed.
Improve My Photos →